Authenticating users using your Azure AD
Administrators are able to configure their Lime CRM application to authenticate users using a connection between Lime CRM and Azure AD. Note that this feature only considers Authentication, i.e. logging on to Lime CRM. Not Authorization, i.e. what you may see/change in Lime CRM nor synchronization of users and groups between Azure AD and Lime CRM.
Requirements
In order for the Azure AD integration to be enabled, the following must be true:
- Lime CRM Server version should be at least 2020.2
- Users (i.e. entries in the
usertable) who wish to log on using Azure AD must have theirusernameset to their Azure AD email address
In addition to this, the Azure AD integration must be configured correctly; both on the Azure AD side as well as on the Lime CRM side.
Warning
AzureAD is not compatible with the LADI AD Sync feature if the synced usernames are not email-addresses.
Configuration - Azure AD side
The best way to configure on the Azure side is the following:
- Create an Enterprise Application
- For that application, configure the App Registration
Creating an Enterprise Application
To create an Enterprise Application, you more or less need to follow this guide. Due to the changing nature of Azure, those docs will take precedence, but let's do it step by step as Azure looks today, to get everytone up to speed.
- First, navigate to Enterprise Applications after logging on. Press New application.
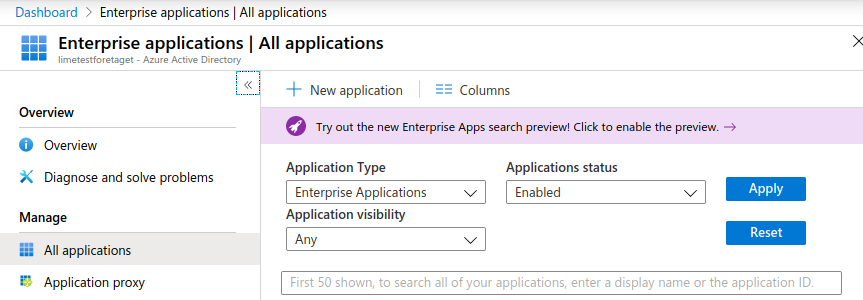
- Select to add a Non-gallery application
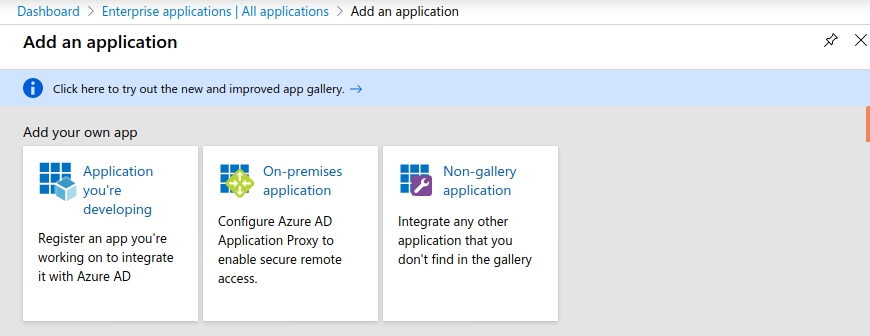
- Name the application something descriptive

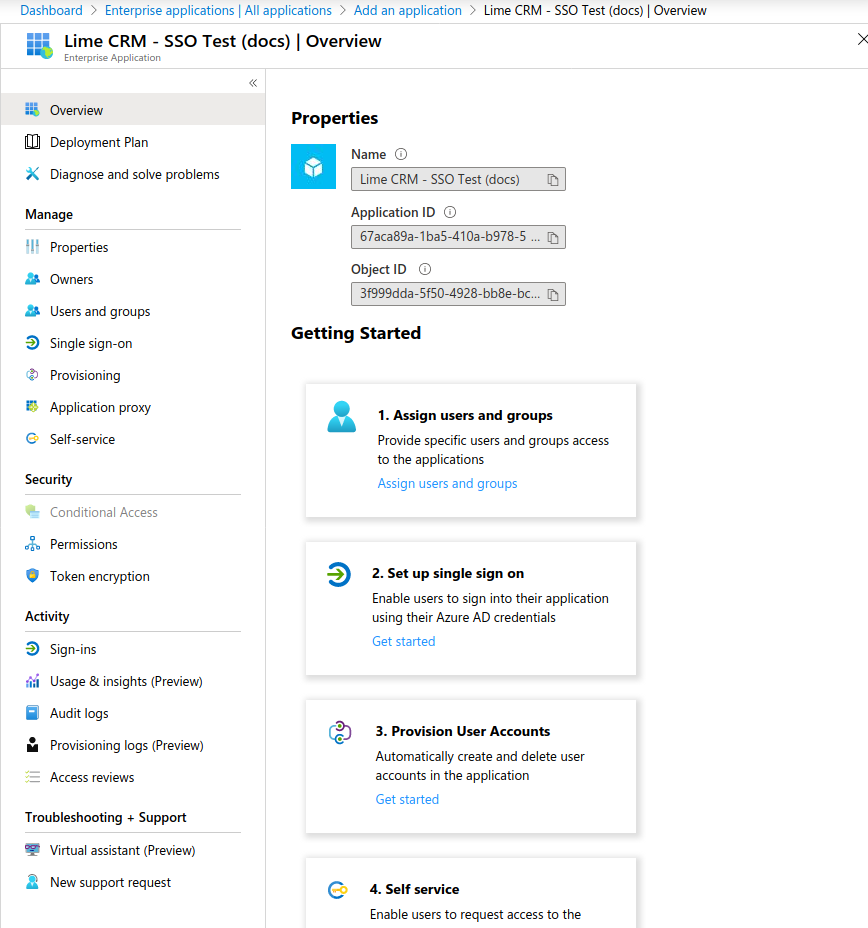
- Then the application is created
Configuring the App Registration
The next step is to configure the App Registration.
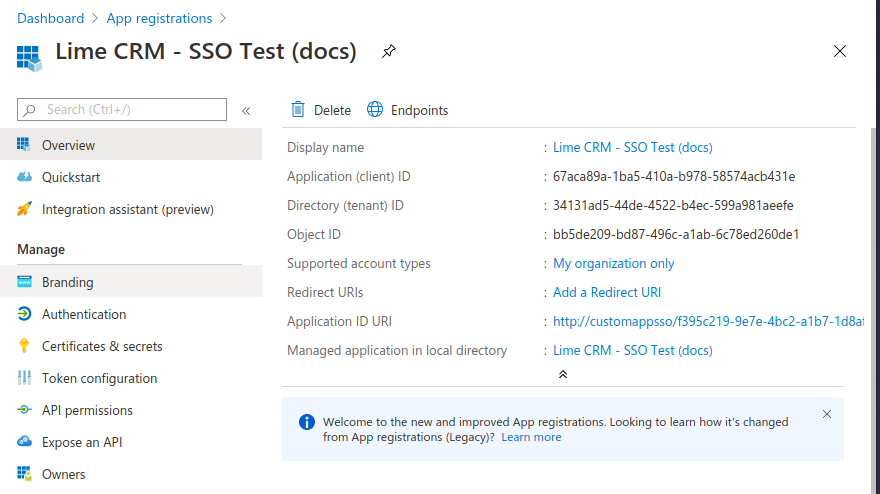
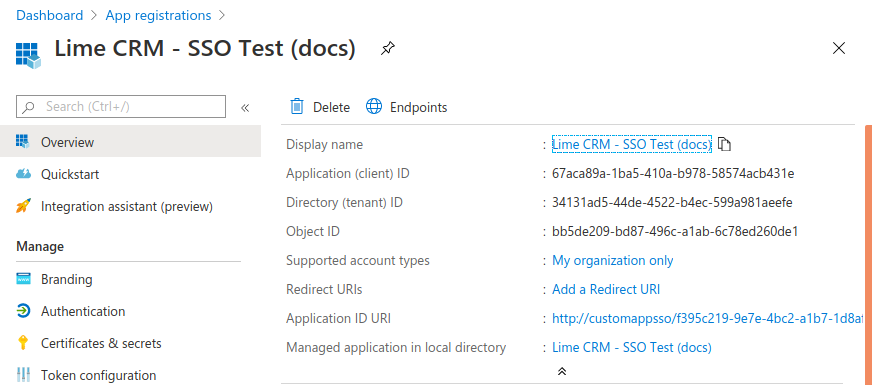
- Start by navigating to App registrations in Azure. You should see the registration for the Enterprise Application that you just created. Click the link for that item.
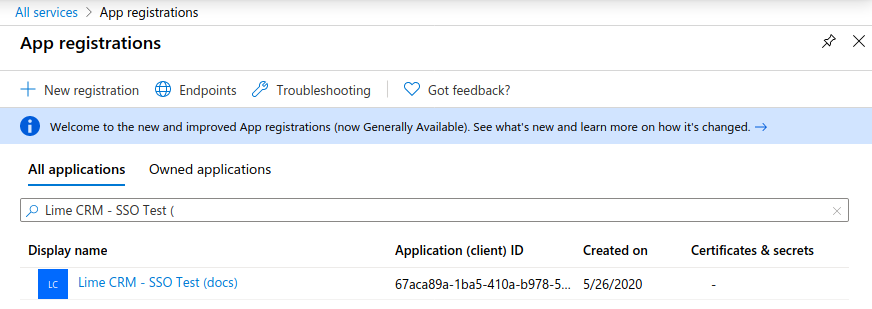
- On this screen, note the
Tenant IDandClient ID. Then navigate to Certificates and Secrets.
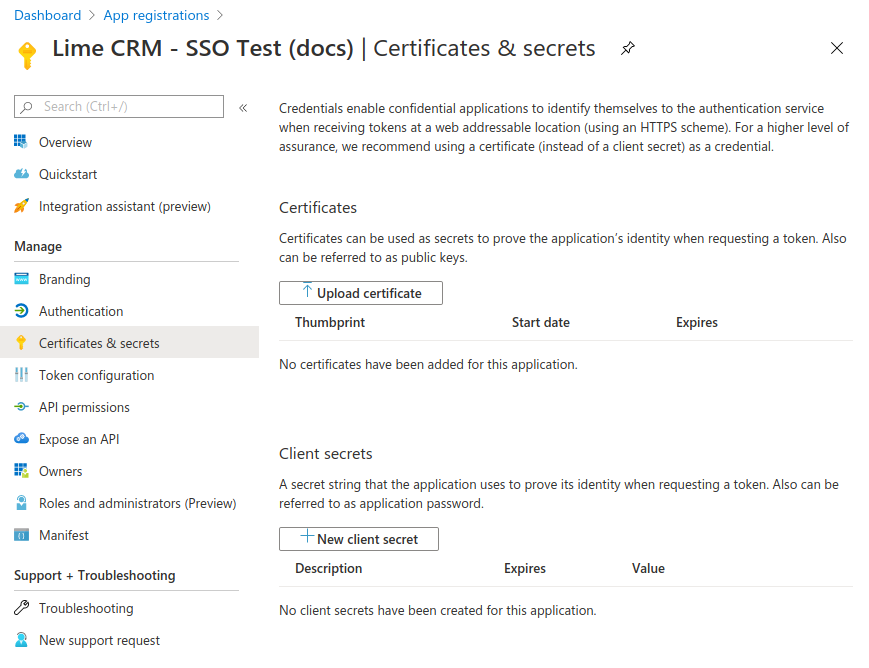
- On the Certificates and Secrets page, we want to create a new Client Secret, which is a shared secret between Azure and Lime CRM, which is one of the components that makes Lime CRM trust that a login request originates from Azure, not from anywhere else. Press New client secret.
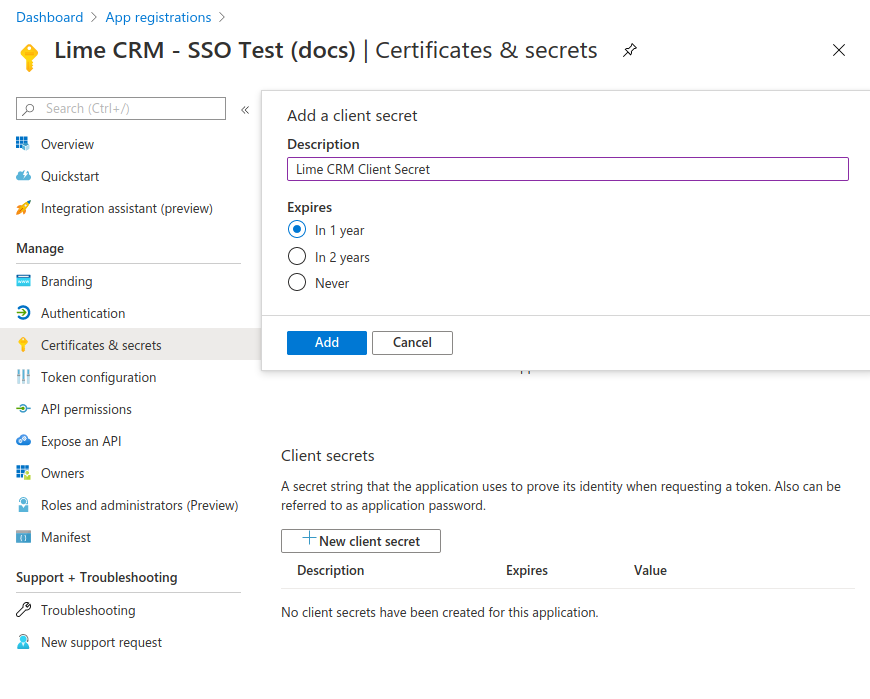
- Give the secret a name and select how long the secret should live. Then press Add.
NOTE: take note of the expiry time of the secret! When this secret times out, users won't be able to log on to Lime CRM!
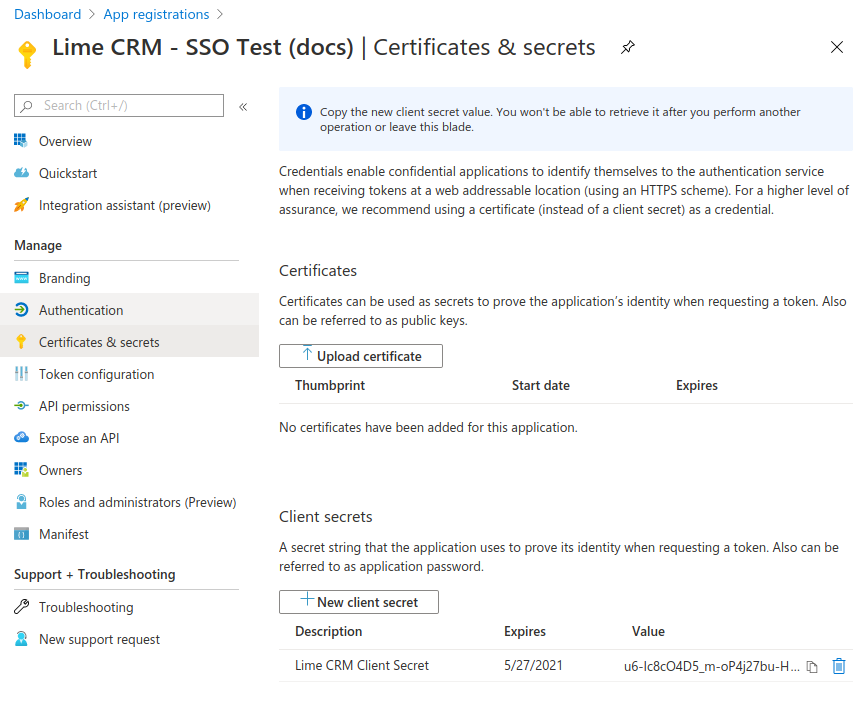
- After the secret is registered, note the client secret's
Value. The value will disappear the next time you see this screen, so copy it and keep it somewhere temporarily.
NOTE: This is the shared "password" that Lime CRM uses to trust Azure AD. Treat this as you treat any passwords. If the password is leaked, a hacker could use this to log on to Lime CRM
(You can be calm - the secret in the screenshot is already removed. 🙂)
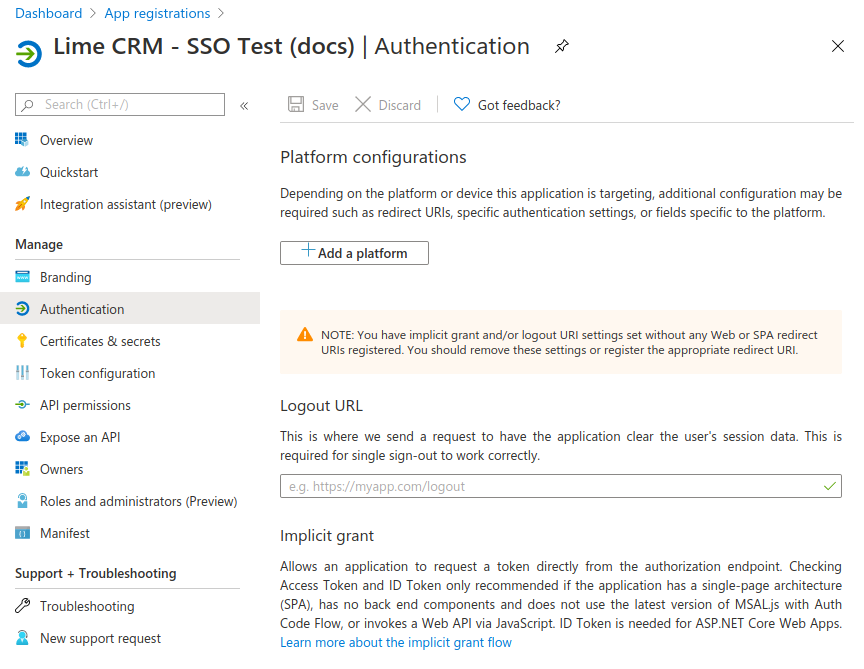
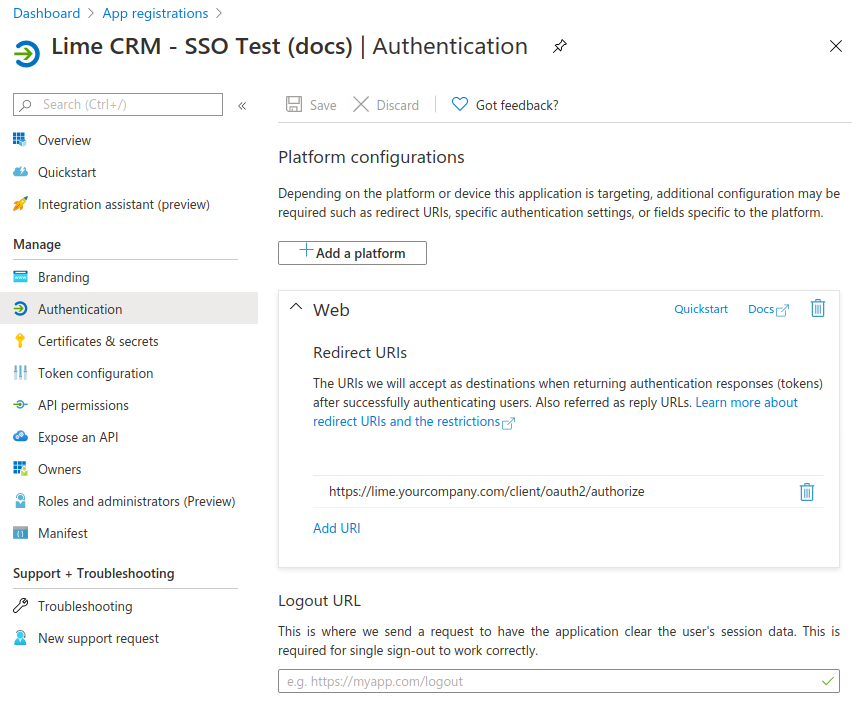
- The last step is to assign the registration a Redirect URI. On the Overview page, press the Add a Redirect URI link.
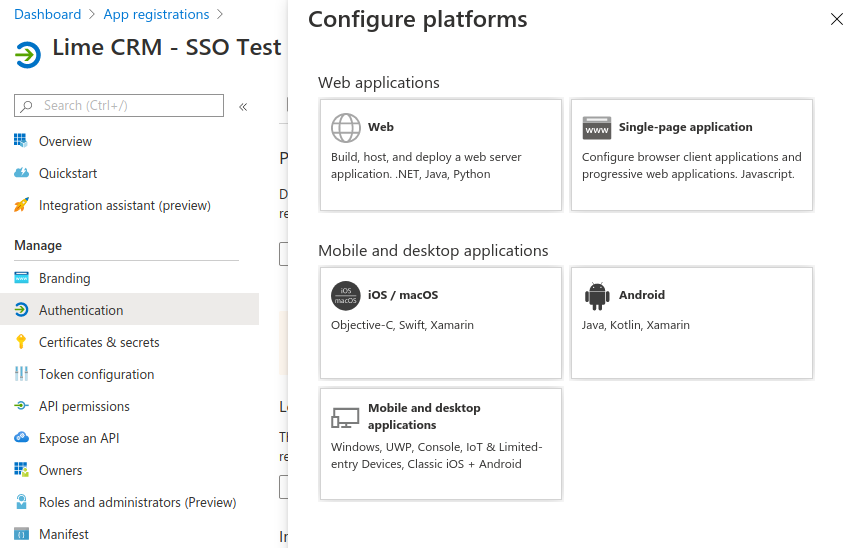
- Press the Add a platform button
- Select Web platform
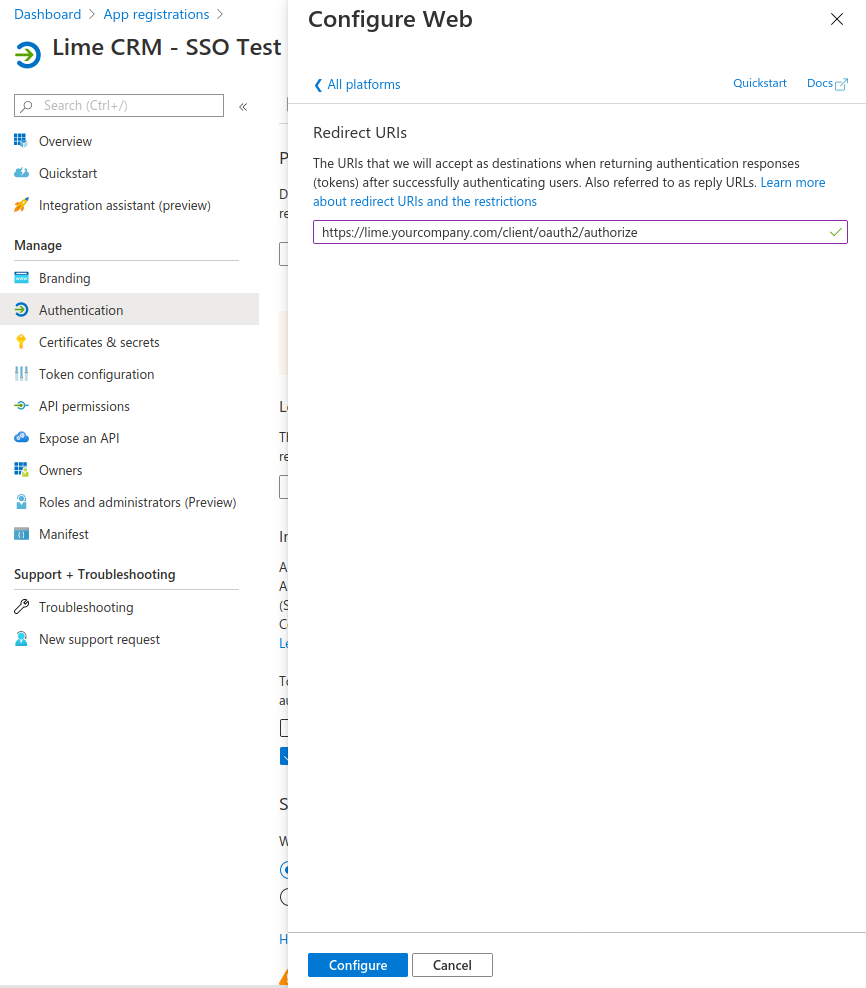
- Write your Redirect URI. The URI should be according to the format
https://lime.yourcompany.com/client/oauth2/authorize. The domain name "lime.yourcompany.com" should be the domain name used by Lime CRM end users to access the Lime CRM installation, so insert your own domain name here. Press Configure at the bottom to save.
- The Redirect URI is registered.
-
At the end of this guide, you should have written three values up:
-
Application ID
- Tenant ID
- Client Secret
All of those will be entered into the Lime CRM configuration file.
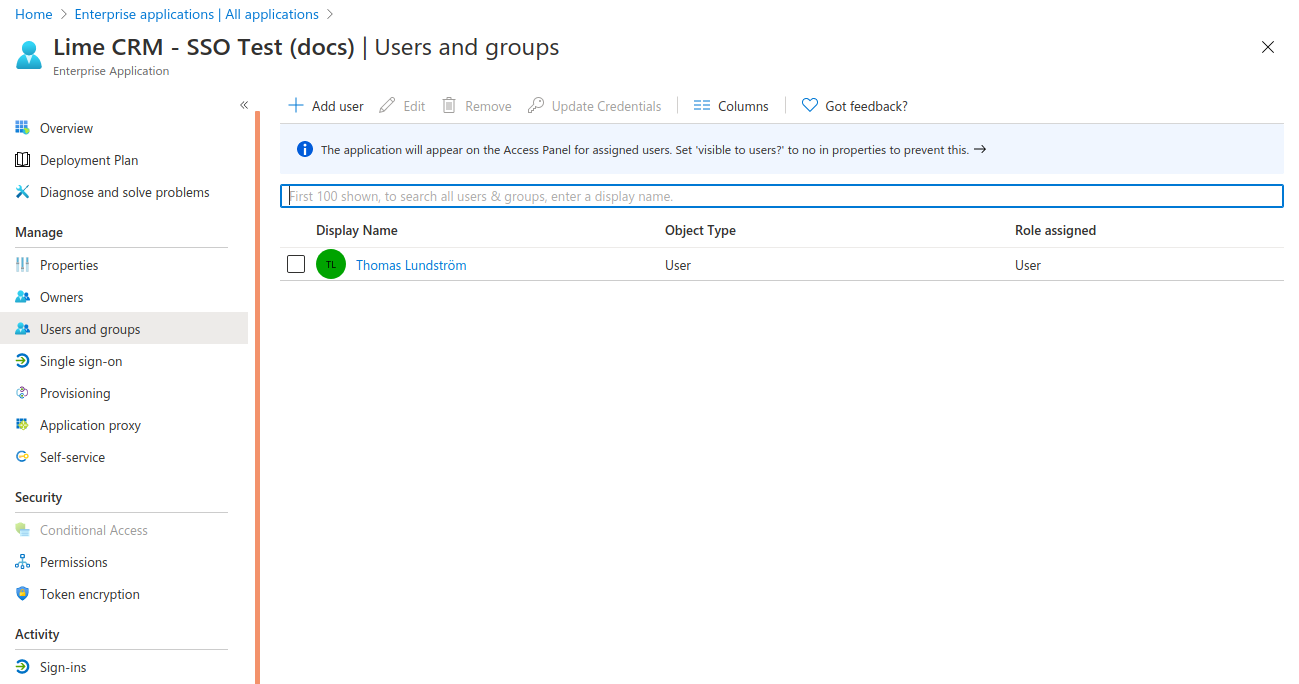
Assigning AD users to the Enterprise Application
Navigate back to the Enterprise Application you just created, and through to Users and Groups in the left panel. Assign the users that should be able to log on.
Configuration - Lime CRM side
Configuring Lime CRM server
If you did the above configuration, you should have three values:
- Application ID
- Tenant ID
- Client Secret
All three are needed, so the next step is to input them into the Lime CRM config file.
Depending on your version of Lime CRM, you will add the configuration into different configuration files. For Lime CRM Keb, i.e. version 2020.2.371(2.76.0) we configure using the machine-level configuration file, config.yaml. For later versions, we configure using the application-level configuration file.
Configuration - 2020.2.371(2.76.0)
On your Lime CRM server, open up the configuration file. See the environment configuration docs for information about file location etc.
Then configure the Azure AD integration as follows:
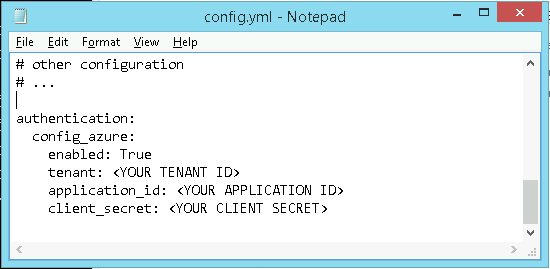
The enabled flag should of course be set to True (you might guess
what happens when you set it to False) and the three configuration
items from the Azure set-up should be pasted into the respective rows.
Configuration - later versions
On your Lime CRM server, open (or create) the application configuration file.
You can configure the Azure AD integration for your application(s) as follows:
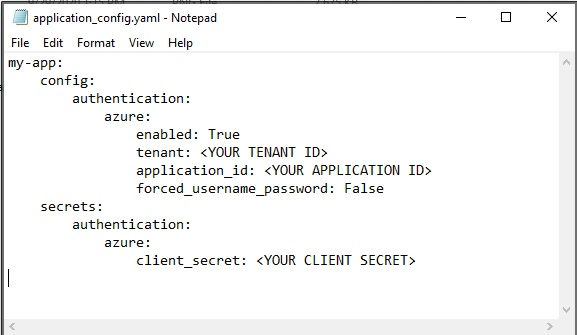
The enabled flag should of course be set to True and the three configuration
items from the Azure set-up should be pasted into the respective rows.
The forced_username_password is provided to bypass the azure login and it is explained in the Enabling Lime user login section.
Configuring the user table
Whenever a user logs on to Azure AD and is sent back to Lime CRM, Azure
AD includes the user's email address in the request. Lime CRM takes
that email address and does a lookup in the user table. Thus, in order
to make this work, all users who wish to log on using Azure AD have to
have their email address in the username column.
One way to do so is to create a user in the LISA with the same email address in Azure AD. The other way is using SCIM to import the users data from Azure AD to lime database.
Usage
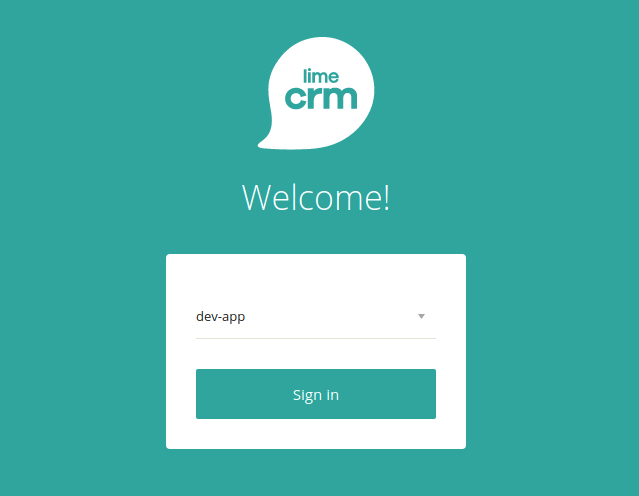
In a multi-application setup, the user is prompted to select a database prior to authentication:
After selecting a database and pressing the "Sign-in" button, the user is redirected to the Microsoft login page where s/he is asked to select an account:
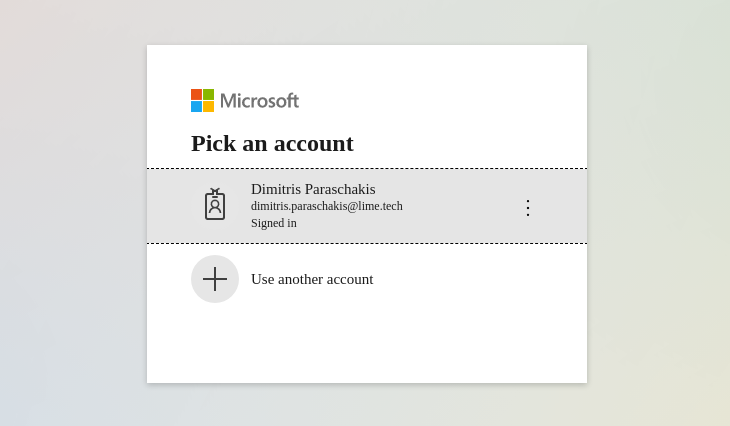
Upon a successful authentication with Microsoft Azure AD, the user will be logged in to Lime CRM.
Enabling Lime user login
There are scenarios that we want to have the Azure feature enabled for all the users while certain users still would be able to login into the system by entering the username and password. For example to let a maintenance user or administrator manage Lime without being part of the active directory.
Warning
Using this feature will remove the extra security that the AzureAD integration provides. It is suggested to set the feature to False as soon as it is not required.
Follow these steps to use this feature.
- Make sure the
forced_username_passwordexist and the it is set toTrue - Add this argument
forced_username_password=Trueto the url. If the application url istest.limecrm.cloud, the url for bypassing the azure login will betest.limecrm.cloud/client/login/?database={application-name}&forced_username_password=True - At this point you cannot login using an Azure account, instead you should enter the username and password of a Lime user. Make sure that the user is an administrator user and it is created in LISA and it is not a SCIM user.